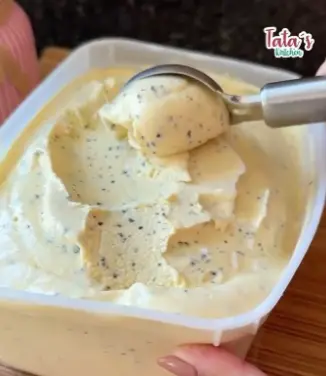
Making ice cream at home can be a delightful and rewarding experience. The image above showcases a creamy, luscious vanilla ice cream that promises to be a hit with your family and friends. This recipe is straightforward, requiring minimal ingredients, and offers a delightful twist with the inclusion of vanilla bean specks, giving it a gourmet touch. Let’s dive into the details of preparing this delicious homemade vanilla ice cream.
Ingredients:
- 2 cups heavy cream
- 1 cup whole milk
- 3/4 cup granulated sugar
- 1 vanilla bean (or 2 teaspoons vanilla extract)
- 4 large egg yolks
- A pinch of salt
Instructions:
- Prepare the Vanilla Bean:
- If using a vanilla bean, split it lengthwise with a sharp knife. Scrape out the seeds with the back of the knife and set aside. Add both the seeds and the pod to a medium saucepan.
- If using vanilla extract, you will add it later.
- Heat the Cream and Milk:
- In the saucepan with the vanilla bean seeds and pod, add the heavy cream, whole milk, and half of the granulated sugar (3/8 cup).
- Heat the mixture over medium heat until it just begins to simmer. Do not let it boil. Stir occasionally to prevent the milk from scorching. Once it’s hot, remove it from the heat and let it steep for 30 minutes to infuse the vanilla flavor.
- Prepare the Egg Yolks:
- In a medium bowl, whisk the egg yolks with the remaining sugar and a pinch of salt until the mixture is pale and slightly thickened.
- Temper the Egg Yolks:
- Gradually pour the warm milk mixture into the egg yolk mixture, whisking constantly to prevent the eggs from curdling. This process is known as tempering.
- Cook the Custard:
- Pour the tempered egg yolk mixture back into the saucepan. Cook over medium-low heat, stirring constantly with a wooden spoon or heatproof spatula. The custard is ready when it thickens enough to coat the back of the spoon and reaches a temperature of about 170°F (77°C). Do not let it boil, as this can cause the custard to curdle.
- Strain and Chill:
- Remove the custard from the heat and strain it through a fine-mesh sieve into a clean bowl to remove the vanilla pod and any cooked egg bits. If you are using vanilla extract instead of a vanilla bean, add it now and stir to combine.
- Cover the bowl with plastic wrap, pressing it directly onto the surface of the custard to prevent a skin from forming. Chill in the refrigerator for at least 4 hours or overnight.
- Churn the Ice Cream:
- Once the custard is thoroughly chilled, pour it into your ice cream maker and churn according to the manufacturer’s instructions. This usually takes about 20-25 minutes. The ice cream will have a soft-serve consistency when it’s done churning.
- Freeze the Ice Cream:
- Transfer the churned ice cream into an airtight container. Place a piece of wax paper or plastic wrap directly on the surface of the ice cream to prevent ice crystals from forming. Seal the container and freeze for at least 4 hours or until firm.
- Serve and Enjoy:
- Your homemade vanilla ice cream is now ready to be enjoyed! Scoop it into bowls or cones, and garnish with your favorite toppings if desired.
Tips and Variations:
- Flavor Variations:
- Chocolate Chip: Add 1 cup of mini chocolate chips during the last 5 minutes of churning.
- Fruit Swirl: Swirl in 1 cup of your favorite fruit preserves or pureed fruit before freezing the ice cream.
- Cookies and Cream: Fold in 1 cup of crushed chocolate sandwich cookies just before transferring to the container.
- Storage:
- Store the ice cream in an airtight container in the freezer for up to 2 weeks. For the best texture, let it sit at room temperature for a few minutes before scooping.
- Serving Ideas:
- Serve your homemade ice cream with fresh berries, chocolate sauce, or caramel drizzle. It also pairs wonderfully with warm desserts like apple pie or brownies.
Making homemade vanilla ice cream is a fun and rewarding process that allows you to create a delicious, creamy dessert tailored to your taste. This recipe is simple enough for beginners and offers plenty of room for creativity with various mix-ins and flavors. Enjoy the process of making and savoring your homemade vanilla ice cream with family and friends. Happy churning!


