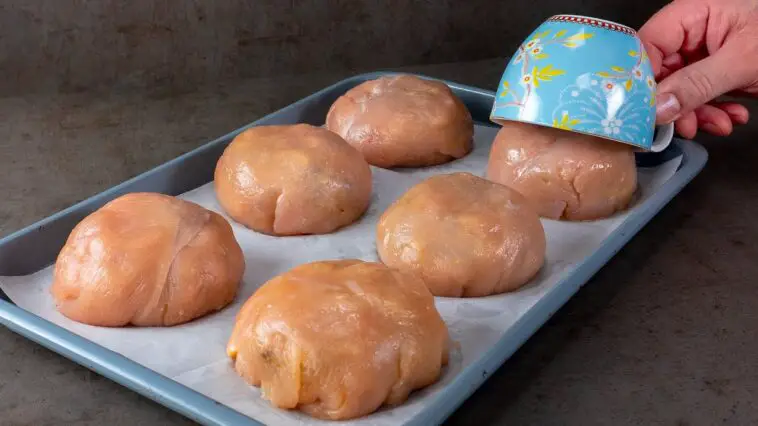
If you have chicken breast and a cup, you’re in for a treat! This chicken delicacy is incredibly flavorful and easy to make. With a delicious filling of sautéed mushrooms, onions, and cheese, this dish is perfect for impressing your guests or treating yourself to a delightful meal. Let’s get started with the recipe!
Ingredients
For the Chicken:
- Chicken breast: 500 g (17.64 oz)
For the Filling:
- Oil: 10 ml (0.34 fl oz)
- Onion: 150 g (5.3 oz), finely chopped
- Salt: 10 g (0.35 oz)
- Black pepper: 5 g (0.18 oz)
- Mushrooms: 300 g (10.6 oz), chopped
- Mayonnaise: 30 g (1 oz)
- Pressed cheese: 100 g (3.5 oz), grated
For Baking:
- Tray size: 25 x 35 cm (10 x 14 in)
- Oven temperature: 180 ˚C (356 °F)
- Baking time: 25 minutes
Instructions
Step 1: Prepare the Chicken
- Slice the chicken breast:
- Start by slicing the 500 g of chicken breast into thin, even pieces. You want the slices to be large enough to line the inside of a cup or ramekin.
- Flatten the chicken:
- Place the chicken slices between two sheets of plastic wrap and gently pound them with a meat mallet until they are about 1/4 inch thick. This will make them easier to mold into the shape of a cup.
Step 2: Prepare the Filling
- Sauté the onions and mushrooms:
- Heat 10 ml of oil in a pan over medium heat. Add the 150 g of finely chopped onion and sauté until softened, about 3-4 minutes.
- Add the 300 g of chopped mushrooms to the pan, followed by 10 g of salt and 5 g of black pepper. Cook until the mushrooms release their moisture and begin to brown, about 5-7 minutes.
- Mix in the mayonnaise and cheese:
- Once the mushrooms and onions are cooked, remove the pan from heat and stir in 30 g of mayonnaise and 100 g of grated pressed cheese. Mix well until everything is evenly combined.
Step 3: Assemble the Chicken Cups
- Prepare the tray:
- Preheat your oven to 180 ˚C (356 °F). Lightly grease the 25 x 35 cm (10 x 14 in) baking tray.
- Form the chicken cups:
- Take a greased or non-stick cup or ramekin and line the inside with the flattened chicken slices, ensuring they cover the bottom and sides. The edges of the chicken should overlap slightly to seal in the filling.
- Add the filling:
- Spoon the mushroom and cheese filling into the center of each chicken-lined cup, filling it generously.
- Transfer to the tray:
- Carefully remove the filled chicken cups from the cups or ramekins and place them on the prepared baking tray, seam side down to keep them intact.
Step 4: Bake the Chicken Cups
- Bake in the oven:
- Place the tray in the preheated oven and bake for 25 minutes. The chicken should be cooked through and lightly browned, and the filling should be hot and bubbling.
Step 5: Serve and Enjoy
- Rest the chicken cups:
- Allow the chicken cups to rest for a few minutes after removing them from the oven. This will help the filling set slightly and make them easier to handle.
- Serve:
- Serve the chicken cups hot, garnished with fresh herbs or a drizzle of your favorite sauce. Pair them with a fresh salad, roasted vegetables, or a light pasta dish.
- Enjoy:
- Enjoy this unique and flavorful chicken dish that’s sure to impress your family and friends!
Cook’s Notes
- Cheese Options: Feel free to experiment with different types of cheese like mozzarella, cheddar, or Gruyère for varied flavors.
- Chicken Thickness: Make sure the chicken slices are not too thick, as this will make it harder to mold into cups and might affect the cooking time.
Variations
Spinach and Ricotta Filling
Replace the mushrooms with sautéed spinach and use ricotta cheese for a creamy, nutrient-rich filling.
Bacon-Wrapped Chicken Cups
Wrap each chicken cup in a slice of bacon before baking for an extra layer of flavor and crispiness.
Herb and Garlic Chicken Cups
Add minced garlic and fresh herbs like thyme or rosemary to the mushroom filling for an aromatic twist.
Stuffed Pepper Chicken Cups
Add diced bell peppers to the filling for a pop of color and sweetness.
Frequently Asked Questions (FAQs)
1. Can I prepare these chicken cups ahead of time?
Yes, you can assemble the chicken cups ahead of time and refrigerate them for up to 24 hours before baking. Just make sure to bring them to room temperature before baking or bake slightly longer if cold.
2. How do I store leftovers?
Store any leftover chicken cups in an airtight container in the refrigerator for up to 3 days. Reheat them in the oven or microwave before serving.
3. Can I freeze the chicken cups?
Yes, you can freeze the uncooked chicken cups. Wrap them tightly in plastic wrap and foil, then freeze for up to 2 months. Thaw in the refrigerator before baking.
4. What can I serve with these chicken cups?
These chicken cups pair well with a variety of sides, such as mashed potatoes, steamed vegetables, or a crisp green salad.
5. Can I use chicken thighs instead of breasts?
Yes, boneless, skinless chicken thighs can be used, but they might need a slightly longer cooking time.
These chicken cups are a delicious and creative way to enjoy chicken breast. With their savory filling and tender chicken, they make for a fantastic meal that’s sure to be a hit. Whether you’re making them for a special occasion or just a weeknight dinner, this recipe is a must-try. Enjoy cooking and savoring this delightful dish!


