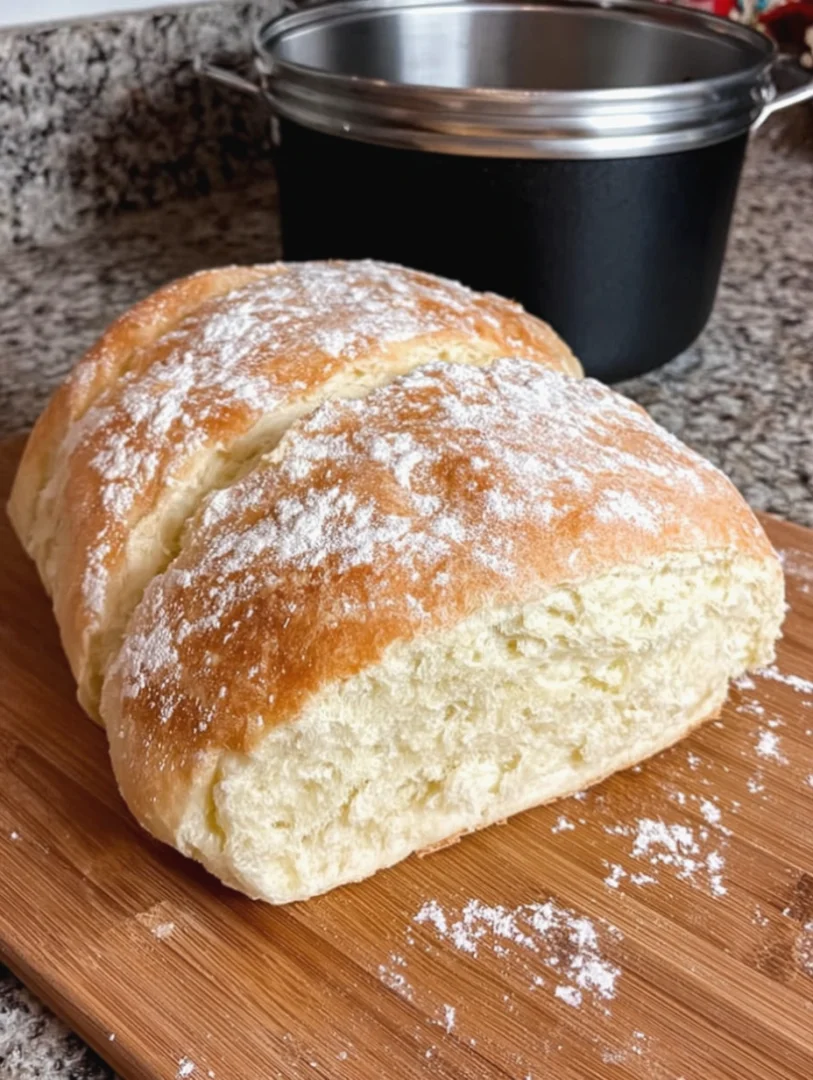
Rustic bread is a beloved staple that embodies the heart and soul of traditional baking. Its crusty exterior and chewy interior make it a favorite for sandwiches or simply enjoyed with butter. This recipe will guide you through making your own rustic bread, utilizing artisan bread techniques that yield a perfect loaf every time. The experience of baking your own bread not only fills your home with an irresistible aroma but also offers a rewarding sense of accomplishment.
Ingredients
- Dry Ingredients:
- 4 cups all-purpose flour (plus extra for dusting; use high-quality flour for better results, as it will affect the texture and flavor of your rustic bread)
- 2 teaspoons salt (preferably sea salt for enhanced flavor)
- 1 teaspoon sugar (for activating yeast, this helps in achieving a good rise)
- 1 packet (2 1/4 teaspoons) active dry yeast (ensure it is fresh for the best performance)
- Wet Ingredients:
- 1 ¾ cups warm water (110°F to 115°F; use filtered water for the best flavor, as tap water can contain chlorine that may inhibit yeast growth)
- 2 tablespoons olive oil (optional, for added flavor and a softer crumb, you can substitute with melted butter if desired)
- Toppings: (optional)
- Fresh herbs (like rosemary or thyme) for flavor enhancement; they can be sprinkled on top before baking or mixed into the dough
- Coarse sea salt for sprinkling on the crust, which adds a delightful crunch and taste contrast
Steps / Instructions
- Prepare Yeast: In a small bowl, combine warm water, sugar, and active dry yeast. Stir gently and let it sit for about 5-10 minutes until it becomes frothy, indicating that the yeast is active and ready to use.
- Mix Dry Ingredients: In a large mixing bowl, whisk together the all-purpose flour and salt. This ensures that the salt is evenly distributed, which is crucial for flavor and dough development.
- Combine Ingredients: Make a well in the center of the dry ingredients. Pour in the frothy yeast mixture and olive oil (if using). Stir with a wooden spoon until a shaggy dough forms. At this stage, the dough will look a bit messy, which is perfectly normal.
- Knead the Dough: Turn the dough out onto a lightly floured surface. Knead for about 10 minutes until it is smooth and elastic. (For a no-knead bread method, skip this step and proceed to the next.) If the dough is sticking to your hands, sprinkle a little flour as needed, but be careful not to over-flour it, as this can result in a dense loaf.
- First Rise: Place the kneaded dough in a lightly oiled bowl, cover it with a damp cloth or plastic wrap, and let it rise in a warm place until it doubles in size, about 1-2 hours. This is an essential step that develops the flavor and texture of your rustic bread.
- Shape the Dough: After the first rise, punch down the dough gently to release air. Shape it into a round or oval loaf by tucking the edges under. Take care to create surface tension on the top, which will help the loaf hold its shape during the second rise.
- Second Rise: Transfer the shaped dough to a parchment-lined baking sheet or a floured proofing basket. Cover it again and let it rise for about 30-60 minutes until it puffs up. You want to see a noticeable increase in size, indicating that the dough is ready for baking.
- Preheat Oven: About 30 minutes before baking, preheat your oven to 450°F (232°C). If using a baking stone, place it in the oven during preheating to ensure it is hot and ready to give your rustic bread a great crust.
- Score the Bread: Just before baking, use a sharp knife or a lame to make a few shallow slashes on the top of the loaf. This helps control the rise during baking and allows for beautiful crust formation.
- Bake: Place the bread in the oven. For a crusty bread baking technique, you can add a pan of water at the bottom of the oven to create steam. Bake for 25-30 minutes until the loaf is golden brown and sounds hollow when tapped on the bottom. The crust should be firm and crispy.
- Cool: Remove the bread from the oven and let it cool on a wire rack before slicing. This allows the interior to set properly, which is crucial for achieving the perfect texture and crumb structure in your rustic bread.
Tips & Tricks
- Storage: Store leftover rustic bread in a paper bag at room temperature for up to 3 days. For longer storage, slice and freeze the bread in an airtight container, where it can last up to 3 months. When ready to eat, simply toast slices directly from the freezer.
- Make Ahead: The dough can be prepared the night before. After the first rise, shape it and place it in the refrigerator overnight. Allow it to come to room temperature and rise again before baking. This slow fermentation process can enhance the flavor.
- Avoid Common Mistakes: Ensure your yeast is fresh for the best rise. If the dough is too sticky, add a little more flour during kneading, but avoid over-flouring. Also, make sure your workspace is adequately floured to prevent sticking.
- Pro Techniques: Experiment with yeast and flour ratios. A higher hydration dough (more water) can yield a more open crumb structure—a characteristic of artisan-style rustic bread. Using a bread baking tool like a Dutch oven can also help achieve a perfect crust by trapping steam.
Variations
- Whole Grain Rustic Bread: Substitute half of the all-purpose flour with whole wheat flour for a denser texture and nutty flavor. This variation adds fiber and nutrients, making your bread a healthier option.
- Herb-Infused Bread: Mix in fresh herbs like rosemary, thyme, or oregano directly into the dough for an aromatic twist that elevates the flavor profile of your rustic bread.
- Savory Add-ins: Consider adding olives, sun-dried tomatoes, or cheese for a more robust flavor. These ingredients can add unexpected bursts of taste, making your bread perfect for snacking or serving at gatherings.
Serving Suggestions
- Pair your rustic bread with a selection of cheeses, cured meats, and fresh fruits for a delightful cheese board that highlights the heartiness of the bread.
- Use slices of rustic bread for open-faced sandwiches topped with avocado, roasted vegetables, or spreads like hummus. The chewy texture of the bread complements these toppings beautifully.
- A slice of warm rustic bread is perfect with a comforting bowl of soup, such as Chicken and Gnocchi Soup, as the crusty exterior holds up well against broth or sauce.