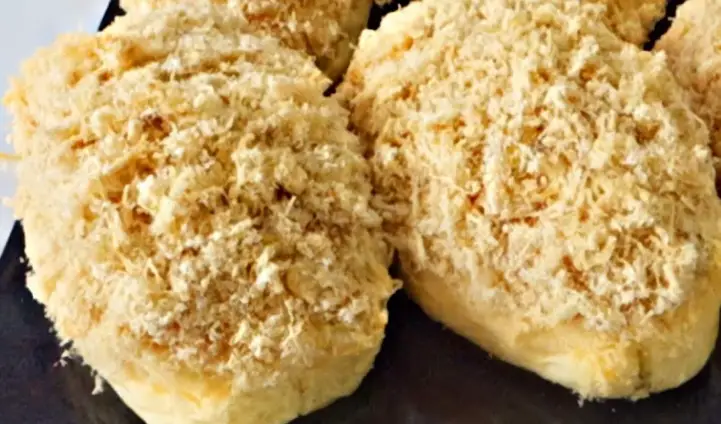
Are you craving a soft and fluffy bun filled with savory chicken floss? Look no further! This Chicken Floss Bun recipe requires no kneading and delivers a perfect, pillowy texture that will have you coming back for more. With simple ingredients and easy-to-follow steps, you can enjoy bakery-quality buns right in your own kitchen. Let’s dive into the recipe and learn how to make these delicious treats!
Ingredients:
- 40g sugar
- 1 tsp yeast
- 100g/ml warm water
- 240g bread flour or all-purpose flour
- 1/4 tsp salt
- 1 whole egg
- 20g margarine
For Filling:
- Mayonnaise
- Chicken floss
Instructions:
Preparing the Dough:
- Activating the Yeast: In a mixing bowl, combine the sugar, yeast, and warm water. Allow the mixture to sit for about 5-10 minutes until frothy.
- Mixing the Dough: Add the bread flour or all-purpose flour, salt, egg, and margarine to the yeast mixture. Stir until a sticky dough forms.
- Shaping the Dough: Divide the dough into equal-sized portions, about 60-65g each. Shape each portion into a smooth ball and place them on a baking tray lined with parchment paper.
- Proofing the Dough: Cover the dough balls with a clean kitchen towel or plastic wrap and let them rise in a warm, draft-free place for about 1 hour, or until doubled in size.
Baking the Buns:
- Preheating the Oven: While the dough is proofing, preheat your oven to 170°C (340°F).
- Baking the Buns: Once the dough has doubled in size, remove the covering and bake the buns in the preheated oven for 15-20 minutes, or until golden brown and cooked through.
Assembling the Buns:
- Cooling the Buns: Allow the baked buns to cool on a wire rack for a few minutes until they are just warm to the touch.
- Filling the Buns: Using a sharp knife, slice each bun horizontally, leaving one edge intact. Spread mayonnaise on one side of the bun and sprinkle chicken floss generously on top.
- Enjoying the Buns: Serve the chicken floss buns warm or at room temperature for a delightful treat!
Cook Notes and Variations:
- Customizing the Filling: Feel free to experiment with different fillings for your buns. Besides chicken floss, you can use tuna, ham, cheese, or any other filling of your choice.
- Adding Flavor: For an extra burst of flavor, you can add seasoning to the dough, such as garlic powder, onion powder, or dried herbs.
FAQs (Frequently Asked Questions):
- Can I use instant yeast instead of active dry yeast? Yes, you can substitute instant yeast for active dry yeast in this recipe. However, you may need to adjust the amount slightly as instant yeast is more potent.
- Can I freeze the baked buns? Yes, you can freeze the baked buns in an airtight container for up to 1 month. To reheat, simply thaw the buns at room temperature or warm them in the oven before serving.
- How do I store the leftover buns? Store any leftover buns in an airtight container at room temperature for up to 2-3 days. For longer storage, freeze the buns and reheat them as needed.
Keto and Low-Carb Versions:
For a keto or low-carb version of these buns, you can experiment with alternative flours such as almond flour or coconut flour. You can also use a sugar substitute such as erythritol or stevia in place of sugar.
In conclusion, these No Kneading Chicken Floss Buns are a delightful snack or breakfast option that’s sure to please your taste buds. With their soft and fluffy texture and savory chicken floss filling, these buns are perfect for any occasion. Whether enjoyed on their own or paired with your favorite beverage, these homemade buns are bound to become a family favorite. So why wait? Give this recipe a try today and treat yourself to the deliciousness of freshly baked buns!