No-Bake Chocolate Peanut Butter Cheerio Bars are the perfect combination of crunchy, chewy, sweet, and salty. These bars are super simple to make and require just a few ingredients, making them a great go-to snack or dessert. With no need for an oven, this recipe is ideal for busy days, parties, or when you just need a quick treat!
Ingredients
- 4 cups Cheerios (plain or honey-nut)
- 1 cup creamy peanut butter
- 1/2 cup honey (or corn syrup)
- 1/2 cup sugar
- 1 teaspoon vanilla extract
- 1 1/4 cups chocolate chips (semi-sweet or milk chocolate)
- 1 tablespoon coconut oil or butter (optional for melting chocolate)
Instructions
Step 1: Prepare the Pan
- Grease a 9×13-inch baking dish with non-stick spray or line it with parchment paper for easy removal.
Step 2: Make the Peanut Butter Mixture
- In a medium saucepan over medium heat, combine the peanut butter, honey, and sugar.
- Stir constantly until the mixture is smooth and the sugar has dissolved, about 3-4 minutes.
- Remove from heat and stir in the vanilla extract.
Step 3: Mix in the Cheerios
- Pour the peanut butter mixture over the Cheerios in a large mixing bowl.
- Stir gently until all the Cheerios are evenly coated with the peanut butter mixture.
Step 4: Press the Mixture into the Pan
- Pour the coated Cheerios mixture into the prepared baking dish.
- Use a spatula or the back of a spoon to press the mixture firmly and evenly into the pan.
Step 5: Melt the Chocolate
- In a microwave-safe bowl, melt the chocolate chips and coconut oil (or butter) in 30-second intervals, stirring in between, until smooth and melted.
- Alternatively, you can melt the chocolate on the stovetop using a double boiler.
Step 6: Top the Bars with Chocolate
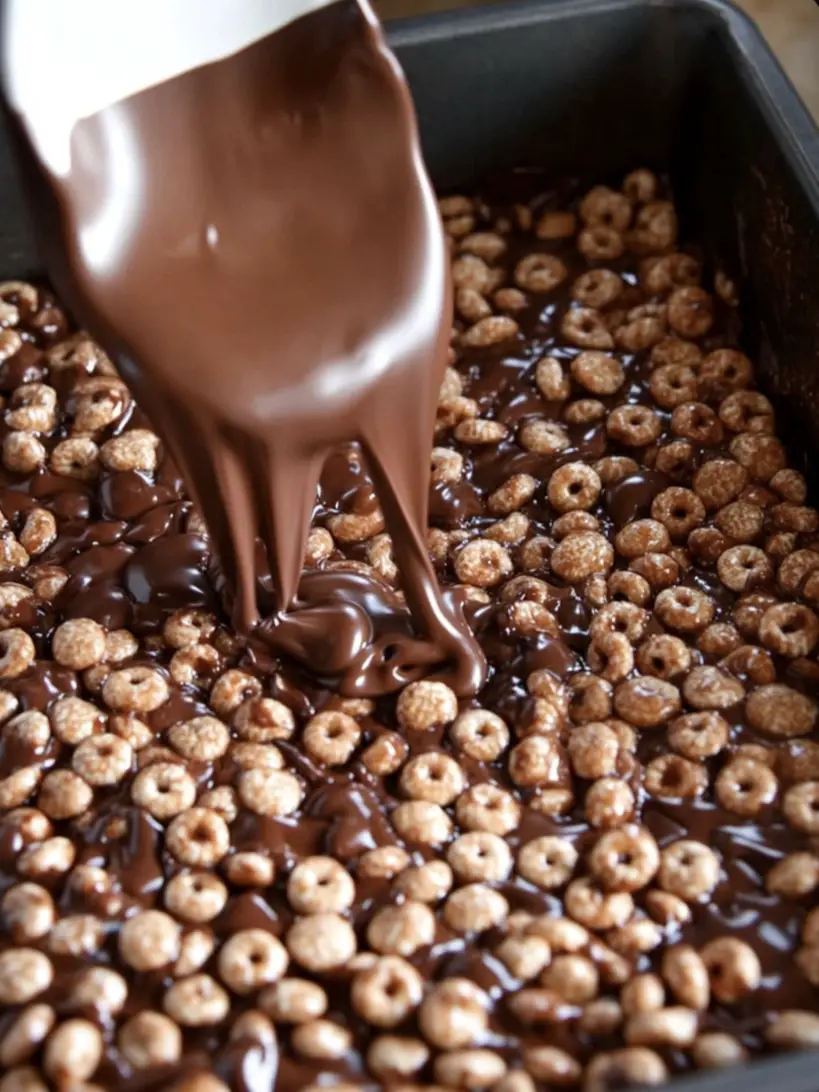
- Pour the melted chocolate over the Cheerios mixture, spreading it evenly with a spatula.
Step 7: Chill the Bars
- Place the baking dish in the refrigerator for 1 hour or until the bars are fully set and the chocolate has hardened.
Step 8: Slice and Serve
- Once the bars have set, remove them from the refrigerator and use the parchment paper to lift them out of the pan.
- Slice the bars into squares or rectangles, and serve.
Cook Notes
- Peanut Butter: Creamy peanut butter works best for a smooth texture, but you can also use crunchy peanut butter if you want some extra texture.
- Honey: You can substitute the honey with corn syrup or maple syrup for a different flavor.
- Chocolate Topping: If you prefer a thicker layer of chocolate, you can increase the amount of chocolate chips to 2 cups.
Variations
Peanut Butter Pretzel Cheerio Bars
For a salty twist, mix 1/2 cup of crushed pretzels into the Cheerio mixture. The salty crunch complements the sweetness of the chocolate and peanut butter.
S’mores Cheerio Bars
Add 1/2 cup of mini marshmallows and 1/4 cup of graham cracker crumbs to the Cheerio mixture for a fun s’mores-inspired treat.
Nutty Cheerio Bars
Fold in 1/4 cup of chopped nuts, such as peanuts, almonds, or cashews, to the Cheerio mixture for extra crunch and flavor.
Frequently Asked Questions (FAQs)
Can I make these bars ahead of time?
Yes! You can make these bars 1-2 days in advance. Store them in an airtight container at room temperature or in the refrigerator until you’re ready to serve.
How do I store leftover bars?
Store the leftover bars in an airtight container at room temperature for up to 1 week, or in the refrigerator for up to 2 weeks. You can also freeze them for up to 3 months.
Can I use a different cereal?
Absolutely! This recipe works with other cereals like Rice Krispies, Corn Flakes, or even a mix of different cereals for a fun twist.
How do I make these bars without added sugar?
For a lower-sugar version, you can use natural peanut butter and substitute the sugar and honey with a low-carb sweetener like erythritol or a sugar-free syrup. Keep in mind this may alter the taste slightly.
No-Bake Chocolate Peanut Butter Cheerio Bars are a delicious, quick, and easy treat that everyone will love. With a satisfying crunch from the Cheerios and the perfect balance of chocolate and peanut butter, these bars are ideal for busy days or last-minute gatherings. Plus, with no need to bake, you can whip them up in no time!
