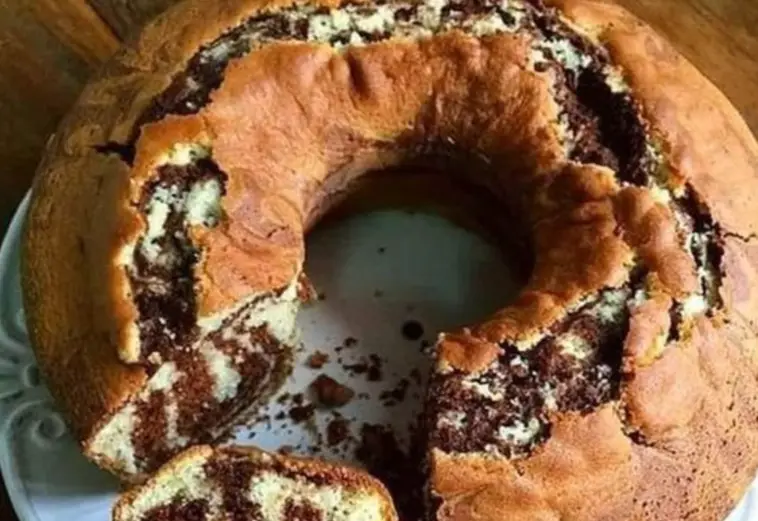
Marble Cake is a classic and beautiful dessert that features a delightful swirl of vanilla and chocolate batter, creating a lovely marble effect. This cake is not only delicious but also visually stunning, making it perfect for special occasions or a simple tea-time treat. Let’s dive into the recipe and learn how to create this delicious and impressive Marble Cake step-by-step.
Ingredients
- 175g/6oz butter or baking spread
- 175g/6oz caster sugar
- 3 free-range eggs, lightly beaten
- ½ tsp vanilla extract
- 225g/8oz self-raising flour
- Pinch of salt
- 2 tbsp milk
- 2 tbsp cocoa powder
- 2 tbsp strong black coffee, cooled
Instructions
Step 1: Prepare the Batter
- Preheat Oven: Preheat your oven to 180°C/160°C Fan/350°F. Grease and line a 20cm/8in round cake tin with baking parchment.
- Cream Butter and Sugar: In a large mixing bowl, beat the butter and caster sugar together until light and fluffy.
- Add Eggs and Vanilla: Gradually add the lightly beaten eggs, a little at a time, beating well after each addition. Stir in the vanilla extract.
- Mix in Dry Ingredients: Sift the self-raising flour and a pinch of salt into the bowl and fold into the mixture until well combined. Add the milk and mix until smooth.
Step 2: Divide and Flavor the Batter
- Divide the Batter: Split the cake batter evenly between two bowls.
- Make Chocolate Batter: In one bowl, sift in the cocoa powder and add the cooled coffee. Mix until well combined and the batter is chocolatey.
Step 3: Create the Marble Effect
- Layer the Batters: Spoon alternate dollops of the vanilla and chocolate batters into the prepared cake tin.
- Swirl the Batters: Use a skewer or a knife to gently swirl the two batters together to create a marbled effect. Be careful not to overmix; you want distinct swirls.
Step 4: Bake the Cake
- Bake: Place the cake tin in the preheated oven and bake for 45-55 minutes, or until a skewer inserted into the center of the cake comes out clean.
- Cool: Remove the cake from the oven and let it cool in the tin for 10 minutes before transferring it to a wire rack to cool completely.
Serving
- Serve: Once the cake is completely cool, slice and serve. Enjoy this delightful Marble Cake with a cup of tea or coffee.
Cooking Notes
- Butter and Eggs: Make sure the butter and eggs are at room temperature before you start. This ensures a smoother batter and better mixing.
- Swirling: When swirling the batters, don’t overdo it. You want to maintain the beautiful marble effect without blending the batters too much.
- Storage: Store the Marble Cake in an airtight container at room temperature for up to 3 days. It can also be frozen for up to 2 months. Wrap it tightly in plastic wrap and then in foil before freezing.
Frequently Asked Questions
Q: Can I use plain flour instead of self-raising flour? A: Yes, you can use plain flour, but you’ll need to add 2 teaspoons of baking powder to the flour to help the cake rise.
Q: Can I omit the coffee? A: Yes, if you prefer not to use coffee, you can replace it with an additional 2 tablespoons of milk. However, the coffee enhances the chocolate flavor without adding a strong coffee taste.
Q: Can I add other flavors? A: Absolutely! You can add a teaspoon of almond extract to the vanilla batter or some orange zest to the chocolate batter for a twist.
Keto/Low Carb Version
To make a keto or low-carb version of Marble Cake, follow these modifications:
- Flour: Replace the self-raising flour with a combination of almond flour and coconut flour.
- Sugar: Use a keto-friendly sweetener like erythritol or monk fruit sweetener.
- Milk: Use unsweetened almond milk or heavy cream.
Marble Cake is a timeless dessert that’s as beautiful as it is delicious. With its moist texture and delightful swirls of vanilla and chocolate, it’s sure to be a hit at any gathering. Try this recipe today and enjoy a slice of this classic treat that’s perfect for any occasion!
Did you enjoy this Marble Cake recipe? Share your experience in the comments below and tag us on social media with your delicious creations! For more classic and easy recipes, subscribe to our blog and follow us for the latest updates. Happy baking!


