Homemade Marshmallow Recipe: Sweet Delights from Scratch
Marshmallows, those fluffy, sugary confections, have been adored for generations. They’re delightful on their own, perfect for toasting over a campfire, or as a topping for hot chocolate. While store-bought marshmallows are convenient, there’s something truly special about crafting your own at home. In this guide, we’ll take you through the steps of creating homemade marshmallows from scratch. Get ready to embark on a sweet adventure in your kitchen!
Ingredients:
- 3 packages (about 21g) of unflavored gelatin
- 1 cup cold water, divided
- 1 ½ cups granulated sugar
- 1 cup light corn syrup
- ¼ teaspoon salt
- 1 teaspoon vanilla extract
- Powdered sugar, for dusting
Instructions:
- Prepare the Gelatin Mixture:
- In the bowl of a stand mixer, combine gelatin and ½ cup of cold water. Let it sit while you prepare the sugar syrup.
- Make the Sugar Syrup:
- In a saucepan, combine granulated sugar, corn syrup, salt, and the remaining ½ cup of cold water. Stir over medium heat until the sugar dissolves. Then, increase the heat and let the mixture come to a boil without stirring. Use a candy thermometer to monitor the temperature.
- Heat the Sugar Syrup:
- Allow the sugar syrup to reach 240°F (115°C) on the candy thermometer. This is the soft-ball stage.
- Combine Syrup with Gelatin:
- With the stand mixer on low speed and the whisk attachment, slowly pour the hot sugar syrup into the gelatin mixture. Be careful as the syrup is extremely hot.
- Whip the Marshmallow Mixture:
- Once all the syrup is added, increase the speed to high and whip until the mixture becomes very thick and white, resembling marshmallow fluff. This usually takes about 10-15 minutes.
- Add Vanilla:
- While the mixture is whipping, add the vanilla extract and continue to beat until fully incorporated.
- Transfer to Pan:
- Grease a 9×13 inch baking dish and dust with powdered sugar. Pour the marshmallow mixture into the prepared pan and smooth the top with a spatula.
- Set and Cut:
- Let the marshmallows sit at room temperature for at least 4 hours, or overnight, until fully set. Once set, use a knife or cookie cutters dusted with powdered sugar to cut the marshmallows into squares or your desired shapes.
- Enjoy!:
- Dust the cut marshmallows with more powdered sugar to prevent sticking. Store in an airtight container at room temperature for up to two weeks.
Cook Notes and Variations:
- Flavored Marshmallows: Add flavor extracts like peppermint, almond, or lemon to the mixture along with the vanilla extract for a unique twist.
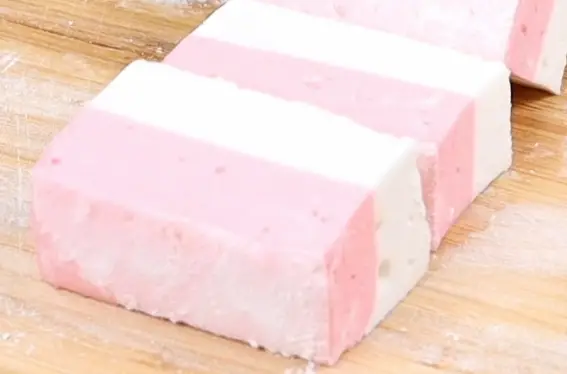
- Colorful Marshmallows: Incorporate food coloring into the mixture to create vibrant marshmallows for special occasions.
- Marshmallow Coating: Instead of powdered sugar, coat the finished marshmallows in cocoa powder, toasted coconut, or crushed nuts for added flavor and texture.
FAQs (Frequently Asked Questions):
Q: Can I make marshmallows without a stand mixer? A: While a stand mixer is recommended for ease, you can use a handheld electric mixer. However, it may take longer to achieve the desired consistency.
Q: Can I use agar agar instead of gelatin for a vegetarian option? A: Yes, agar agar can be used as a vegetarian alternative to gelatin. Follow the instructions on the agar agar package for substitution ratios.
Q: How do I store homemade marshmallows? A: Store marshmallows in an airtight container at room temperature. Avoid storing them in the refrigerator as they can become sticky.
Q: Can I freeze homemade marshmallows? A: Yes, you can freeze homemade marshmallows for up to three months. Thaw them at room temperature before serving.Keto and Low-Carb Versions:
For a keto-friendly or low-carb version of homemade marshmallows, you can substitute the granulated sugar and corn syrup with erythritol or a monk fruit sweetener. Be sure to check the sweetness level and adjust accordingly to your taste preferences. Additionally, use a sugar-free powdered sweetener for dusting instead of powdered sugar.
Creating homemade marshmallows is a fun and rewarding experience that yields delicious results. Whether you’re making them for a special occasion or simply indulging in a sweet treat, the process is sure to bring joy to your kitchen and delight to your taste buds. With this recipe and tips in hand, you’re ready to embark on your marshmallow-making adventure. Happy cooking!


