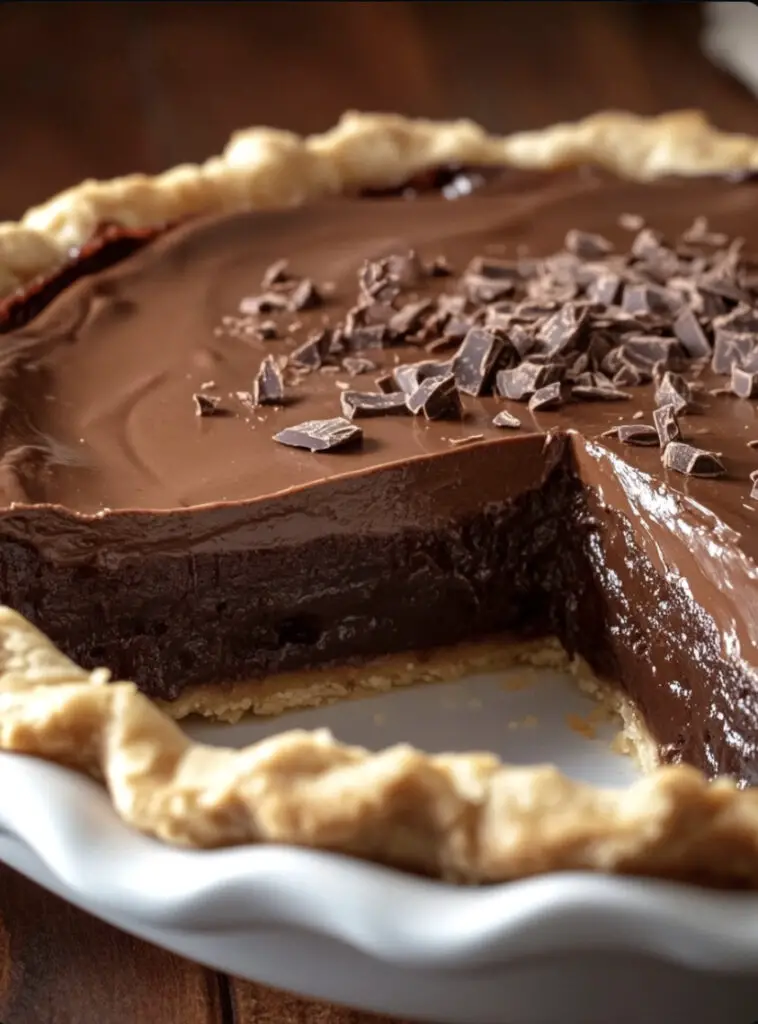
Grandma’s Chocolate Pie is a timeless, comforting dessert that’s rich, creamy, and full of nostalgic flavor. With a silky chocolate custard filling and a buttery, flaky crust, this pie is the perfect indulgence for any occasion. Whether you’re serving it for a holiday meal or just craving a taste of something sweet, this chocolate pie will transport you back to Grandma’s kitchen with every bite.
Ingredients
For the Pie Crust:
- 1 ½ cups all-purpose flour
- 1 tablespoon granulated sugar
- ½ teaspoon salt
- ½ cup cold unsalted butter, cubed
- 4-6 tablespoons ice water
For the Chocolate Filling:
- 1 cup granulated sugar
- ¼ cup unsweetened cocoa powder
- ¼ cup cornstarch
- ¼ teaspoon salt
- 3 large egg yolks
- 2 ½ cups whole milk
- 2 tablespoons unsalted butter
- 1 teaspoon vanilla extract
- Whipped cream or meringue for topping (optional)
Instructions
Step 1: Prepare the Pie Crust
In a large mixing bowl, combine the flour, sugar, and salt. Cut in the cold butter using a pastry cutter or your fingers until the mixture resembles coarse crumbs. Gradually add ice water, one tablespoon at a time, until the dough comes together. Form the dough into a disc, wrap it in plastic wrap, and refrigerate for at least 30 minutes.
Step 2: Roll Out the Pie Crust
Preheat your oven to 375°F (190°C). On a lightly floured surface, roll out the chilled dough to about 1/8 inch thickness. Fit the dough into a 9-inch pie dish and trim the excess around the edges. Poke the bottom of the crust with a fork to prevent bubbling, then line it with parchment paper and add pie weights or dried beans.
Step 3: Blind Bake the Pie Crust
Bake the crust in the preheated oven for 15 minutes. Remove the parchment and pie weights, then bake for an additional 10-12 minutes or until the crust is golden brown. Remove from the oven and allow it to cool completely.
Step 4: Make the Chocolate Filling
In a medium saucepan, whisk together the sugar, cocoa powder, cornstarch, and salt. In a separate bowl, lightly beat the egg yolks. Gradually whisk in the milk until the mixture is smooth.
Place the saucepan over medium heat and slowly pour the milk and egg mixture into the dry ingredients while whisking constantly. Continue cooking, whisking frequently, until the mixture thickens and begins to bubble, about 8-10 minutes.
Step 5: Add Butter and Vanilla
Once the filling has thickened, remove the saucepan from heat. Stir in the butter and vanilla extract until fully combined and smooth.
Step 6: Pour and Chill
Pour the warm chocolate filling into the pre-baked pie crust. Smooth the top with a spatula, then refrigerate the pie for at least 3 hours to allow the filling to set.
Step 7: Serve with Whipped Cream or Meringue
Once the pie has chilled and set, top it with a dollop of whipped cream or a layer of meringue (if desired). Slice and enjoy!
Cooking Notes
- Cornstarch: Cornstarch is essential for thickening the filling. Be sure to cook it long enough so the filling reaches a thick, pudding-like consistency.
- Blind Baking: Blind baking the pie crust ensures that it stays crisp and doesn’t become soggy from the chocolate filling.
- Whipped Cream vs. Meringue: Both whipped cream and meringue are classic toppings for chocolate pie. Choose your favorite or leave the pie as is for a more straightforward dessert.
Variations
1. Chocolate Meringue Pie
Top the pie with meringue made by whipping 3 egg whites with ½ cup of sugar until stiff peaks form. Spread the meringue over the chocolate filling and bake at 350°F for 10 minutes, or until the meringue is golden.
2. Chocolate Peanut Butter Pie
Swirl ½ cup of melted peanut butter into the chocolate filling before chilling for a delicious chocolate-peanut butter combination.
3. Double Chocolate Pie
For extra decadence, fold in ½ cup of chocolate chips to the filling after removing it from heat. The chocolate chips will melt slightly but still add texture and richness.
4. Gluten-Free Chocolate Pie
Make this pie gluten-free by using a gluten-free pie crust or skipping the crust altogether and serving the filling in individual cups for a crustless dessert.
Keto Version and Low-Carb Adjustments
To make a keto-friendly version of this pie, follow these adjustments:
- Use a keto pie crust made from almond flour and butter instead of the traditional flour crust.
- Replace the sugar with erythritol or monk fruit sweetener for a low-carb sweetener option.
- Use unsweetened almond milk or heavy cream in place of whole milk to reduce the carb content.
These adjustments will keep the creamy, chocolatey goodness while making the pie low-carb and keto-friendly.
Frequently Asked Questions (FAQs)
Q: Can I make this pie ahead of time?
Yes! This pie can be made up to 2 days in advance and stored in the refrigerator. Just wait to add any whipped cream or meringue until just before serving.
Q: How do I store leftovers?
Cover the pie with plastic wrap or foil and store in the refrigerator for up to 4 days.
Q: Can I freeze chocolate pie?
You can freeze the pie (without whipped cream or meringue) for up to 3 months. Thaw in the fridge overnight before serving.
Q: Can I use a store-bought pie crust?
Yes, for convenience, you can use a pre-made pie crust. Simply follow the blind baking instructions to ensure it’s cooked before adding the filling.
This Grandma’s Chocolate Pie is the ultimate comfort dessert, offering a rich and velvety chocolate filling encased in a buttery, flaky crust. Whether topped with whipped cream or meringue, this pie is a nostalgic treat that’s perfect for any occasion. Its simple ingredients and easy preparation make it a go-to dessert that everyone will love. Try this recipe today, and savor every bite of this decadent chocolate pie!


