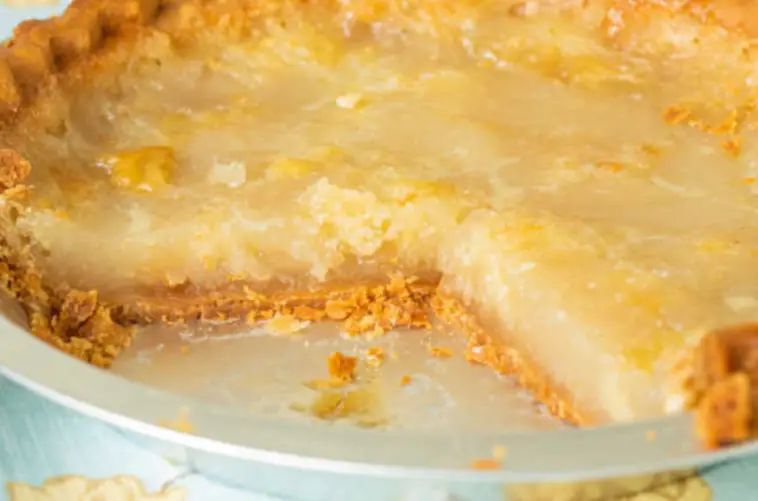
Depression Era Water Pie is a unique and nostalgic dessert that emerged during the Great Depression, a time when resources were scarce and creativity was key to making do with what was available. Despite its name and simple ingredients, this pie is surprisingly delicious, offering a custard-like filling with a rich flavor. It’s a testament to the ingenuity of cooks who could turn a few basic ingredients into a delightful treat. This guide will walk you through making this historic pie with detailed steps, tips, and suggestions for perfecting the recipe.
Ingredients
- 1 deep dish 9-inch pie crust, unbaked
- 1 1/2 cups water
- 4 tablespoons all-purpose flour
- 1 cup granulated sugar
- 1/2 teaspoon salt
- 2 teaspoons vanilla extract
- 5 tablespoons butter, sliced
Instructions
1. Preheat the Oven
1.1. Preheat Oven: Begin by preheating your oven to 425°F (220°C). This high temperature is crucial for achieving the crisp, golden top that is characteristic of the pie.
2. Prepare the Pie Crust
2.1. Prepare Crust: Place your unbaked deep dish pie crust into a 9-inch pie pan. Make sure the crust is evenly spread and gently pressed into the pan, ensuring it covers the bottom and sides fully. Trim any excess dough hanging over the edges to prevent burning during baking.
3. Mix the Filling
3.1. Combine Dry Ingredients: In a medium mixing bowl, whisk together the flour, granulated sugar, and salt. These dry ingredients form the base of the custard-like filling.
3.2. Add Liquid Ingredients: Gradually add the water to the dry ingredients while whisking continuously. This step is important to ensure there are no lumps in the mixture. Whisk until the ingredients are fully combined and smooth.
3.3. Add Vanilla: Stir in the vanilla extract, which will add a subtle depth of flavor to the pie.
4. Pour the Filling
4.1. Pour Filling into Crust: Carefully pour the prepared filling mixture into the unbaked pie crust. The liquid will be quite thin, but it will thicken as it bakes.
5. Add Butter
5.1. Top with Butter: Place the sliced butter evenly on top of the filling. As the pie bakes, the butter will melt and create a golden, slightly crisp top layer.
6. Bake the Pie
6.1. Bake: Place the pie in the preheated oven and bake for 30-35 minutes. The pie should puff up slightly and develop a golden brown top. The filling will set as the pie cools, resulting in a creamy custard texture.
7. Cool and Serve
7.1. Cool: Allow the pie to cool completely on a wire rack before serving. This cooling period is crucial for the filling to fully set and achieve the desired consistency.
7.2. Serve: Slice and serve the pie at room temperature or slightly chilled. It pairs well with a dollop of whipped cream or a scoop of vanilla ice cream for added indulgence.
Tips for Success
Pie Crust:
- Use a Deep Dish Crust: Opt for a deep dish pie crust to ensure there is enough space for the filling and to prevent overflow during baking.
- Prevent Sogginess: To prevent the crust from becoming soggy, consider pre-baking (blind baking) the crust for about 5-10 minutes before adding the filling. This will help create a barrier that keeps the crust crisp.
Mixing the Filling:
- Avoid Lumps: Whisk the dry ingredients thoroughly before adding the water to prevent lumps in the filling. Ensure the mixture is smooth and well-combined.
- Consistency: The filling will be thin before baking but will thicken as it cooks. Don’t be concerned if it seems watery initially.
Baking:
- Monitor Baking: Keep an eye on the pie as it bakes to prevent over-browning. If the top becomes too dark, cover it with aluminum foil to protect it from further browning.
Cooling:
- Allow to Set: Cooling the pie completely is essential for the filling to set properly. It may still be slightly wobbly when you first remove it from the oven but will firm up as it cools.
Variations:
- Flavor Enhancements: For a twist on the classic flavor, add a pinch of cinnamon or nutmeg to the filling for extra warmth and spice.
- Fruit Additions: You can also experiment by adding a layer of fresh or canned fruit at the bottom of the pie crust before pouring in the filling. Berries, peaches, or apples work well and add a fruity note to the pie.
Storage:
- Refrigerate: Store leftover pie in the refrigerator for up to 4 days. Ensure it is covered to maintain freshness.
- Freeze: For longer storage, you can freeze the pie for up to 2 months. Thaw it in the refrigerator before serving.
Serving Suggestions:
- Top with Whipped Cream: A dollop of whipped cream or a scoop of vanilla ice cream can enhance the pie’s flavor and texture.
- Garnish: For a touch of elegance, sprinkle a light dusting of powdered sugar on top before serving.
Depression Era Water Pie is a delightful reminder of a time when home cooks made the most of limited resources. With its simple ingredients and easy preparation, it’s a comfort food that proves you don’t need elaborate ingredients to create something truly special. Enjoy this historical recipe and savor a piece of culinary history that continues to bring joy to those who taste it.


