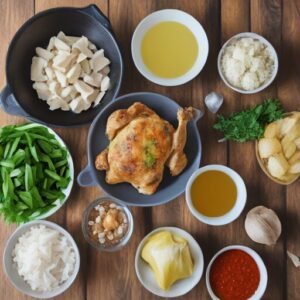
Prepare to tantalize your taste buds with the irresistible flavors of Roasted Garlic Chicken Skillet, a culinary masterpiece that marries succulent chicken with rich, creamy roasted garlic sauce. This indulgent dish is a true comfort food classic, perfect for family dinners or entertaining guests. With its combination of tender chicken, crispy coating, and velvety sauce, it’s sure to become a favorite in your recipe repertoire. Let’s dive into the savory world of Roasted Garlic Chicken Skillet and learn how to create this culinary delight!
Ingredients:
For the Chicken:
- 6 large boneless, skinless chicken thighs or breast tenders, trimmed of fat and pounded to an even thickness
- 2 cups buttermilk
Seasoned Flour:
- 2 cups all-purpose flour
- 1 teaspoon salt
- 1/2 teaspoon pepper
- 1/2 teaspoon garlic powder
- 1/2 teaspoon paprika
Egg Wash:
- 2 large eggs
- 1/4 cup water
Breadcrumbs:
- 2 cups panko or seasoned Italian breadcrumbs
- 3/4 cup parmesan cheese, grated
- 2 tablespoons fresh parsley, minced
- Vegetable oil, as needed, for frying
For the Sauce:
- 3 tablespoons unsalted butter
- 3 tablespoons all-purpose flour
- 2 heads garlic, ends cut off, roasted and mashed
- 1 cup low-sodium chicken broth
- 1/3 cup heavy cream
- 1/3 cup parmesan cheese, grated
- 1 tablespoon fresh parsley, finely chopped
- Kosher salt and freshly ground pepper, to taste
Instructions:
1. Prepare the Chicken:
- Place the trimmed and pounded chicken in a large bowl and cover with buttermilk. Let it marinate for at least 30 minutes, or up to overnight in the refrigerator.
2. Prepare the Coating:
- In separate bowls, prepare the seasoned flour, egg wash, and breadcrumbs.
- Season the flour with salt, pepper, garlic powder, and paprika.
- Beat the eggs with water to create the egg wash.
- Mix together the breadcrumbs, parmesan cheese, and minced parsley.
3. Coat the Chicken:
- Remove the chicken from the buttermilk and dredge each piece in the seasoned flour, shaking off any excess.
- Dip the floured chicken into the egg wash, then coat evenly with the breadcrumb mixture, pressing gently to adhere.
4. Fry the Chicken:
- Heat vegetable oil in a large skillet over medium-high heat.
- Fry the coated chicken in batches until golden brown and cooked through, about 4-5 minutes per side.
- Transfer the cooked chicken to a paper towel-lined plate to drain excess oil.
5. Prepare the Sauce:
- In the same skillet, melt the butter over medium heat. Stir in the flour to form a roux, cooking until golden brown and fragrant.
- Add the roasted and mashed garlic to the skillet, stirring to incorporate.
- Gradually whisk in the chicken broth and heavy cream, stirring constantly until smooth and thickened.
- Stir in the grated parmesan cheese and chopped parsley. Season with salt and pepper to taste.
6. Serve:
- Arrange the fried chicken on a serving platter and pour the roasted garlic sauce over the top.
- Garnish with additional chopped parsley, if desired, and serve hot.
Cook’s Notes and Variations:
- Make-Ahead Tip: You can prepare the coated chicken in advance and refrigerate it for up to 4 hours before frying. This makes it convenient for entertaining or busy weeknights.
- Oven-Baked Option: For a healthier alternative, you can bake the coated chicken in a preheated oven at 375°F (190°C) for 25-30 minutes, or until golden brown and cooked through.
- Cheese Variation: Experiment with different types of cheese in the breadcrumb mixture for added flavor. Cheddar, Asiago, or Romano cheese are excellent options.
- Herb Infusion: Enhance the flavor of the sauce by adding additional herbs such as thyme, rosemary, or basil.
FAQs (Frequently Asked Questions):
Q: Can I use chicken breasts instead of thighs? A: Yes, you can use boneless, skinless chicken breasts instead of thighs. However, be mindful of adjusting the cooking time as chicken breasts may cook faster than thighs.
Q: How do I roast garlic? A: To roast garlic, simply cut the top off a head of garlic to expose the cloves. Drizzle with olive oil, wrap in aluminum foil, and roast in a preheated oven at 400°F (200°C) for about 30-40 minutes, or until soft and caramelized.
Q: Is there a keto-friendly version of this recipe? A: Yes, you can make a keto-friendly version by using almond flour or coconut flour in place of all-purpose flour for the coating. Substitute heavy cream with coconut cream and omit breadcrumbs for a low-carb option.
Q: Can I make this dish gluten-free? A: Yes, you can make this dish gluten-free by using gluten-free flour for the coating and breadcrumbs. Ensure all other ingredients are gluten-free as well.
Keto-Friendly Version:
For a keto-friendly version of Roasted Garlic Chicken Skillet, substitute almond flour or coconut flour for the all-purpose flour in the coating. Use coconut cream instead of heavy cream in the sauce and omit breadcrumbs for a low-carb option. Ensure all other ingredients are keto-friendly and low in carbohydrates.
Low-Carb Variation:
To make a low-carb variation of this recipe, use almond flour or coconut flour for the coating and omit breadcrumbs altogether. Additionally, you can reduce the amount of flour used in the sauce or use a thickening agent such as xanthan gum. Serve the chicken with steamed vegetables or a side salad for a low-carb meal.

In conclusion, Roasted Garlic Chicken Skillet is a culinary delight that combines tender chicken with a creamy roasted garlic sauce for a truly indulgent dining experience. With its crispy coating and velvety sauce, this dish is sure to please even the most discerning palates. Whether you’re cooking for a special occasion or simply craving comfort food, this recipe is a winner. So, gather your ingredients and treat yourself to the exquisite flavors of Roasted Garlic Chicken Skillet. Bon appétit!


