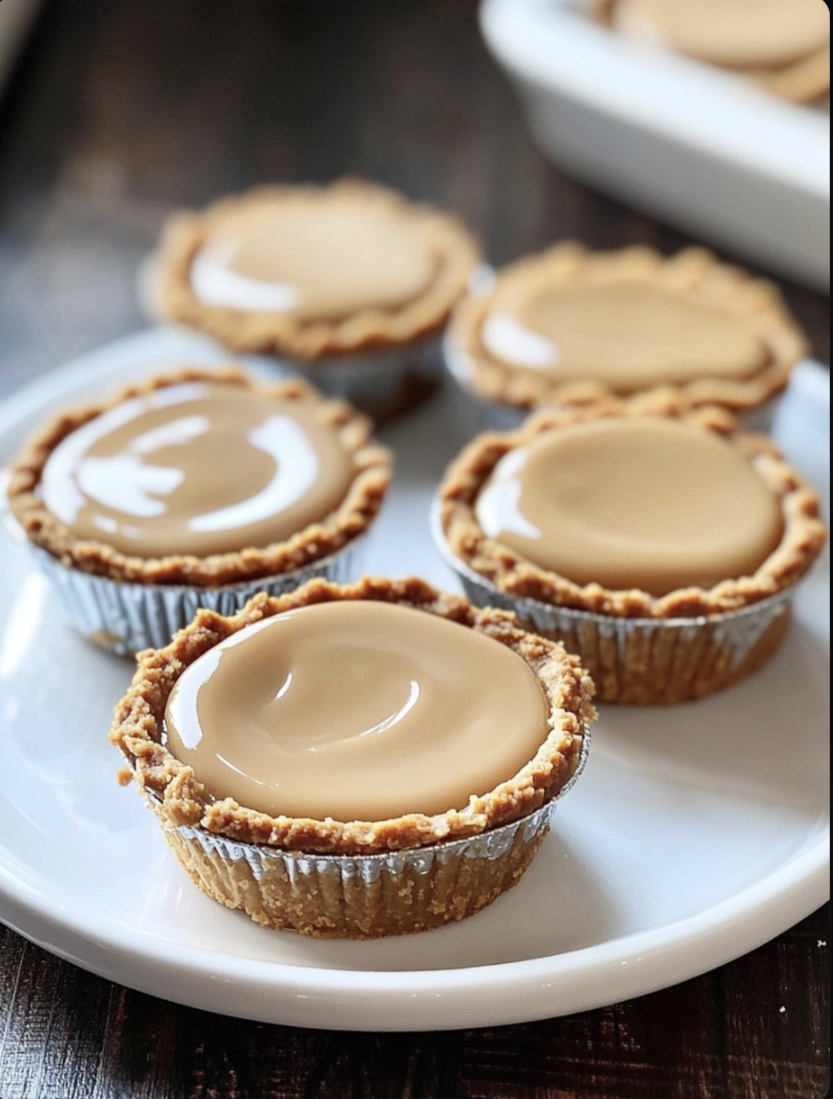
There’s something undeniably delightful about the combination of peanut butter and dessert. The rich, creamy, nutty flavor of peanut butter paired with a buttery crust is a match made in culinary heaven. Mini Peanut Butter Pies take that classic pairing and turn it into an easy, no-bake dessert that’s perfect for parties, holidays, or anytime you’re craving a sweet treat. These bite-sized pies offer the indulgence of a full-sized peanut butter pie, but in mini form, making them ideal for sharing (or enjoying all by yourself!).
In this article, we’ll explore the step-by-step process of making mini peanut butter pies, some variations you can try, and answer common questions about these delightful treats. Whether you’re a seasoned baker or just starting, this recipe is simple, quick, and guaranteed to satisfy your sweet tooth.
Why Mini Peanut Butter Pies?
Peanut butter desserts have long been a favorite for their rich, comforting flavor. From peanut butter cookies to peanut butter fudge, the options are endless. What makes mini peanut butter pies stand out is their convenience. These individual-sized treats are perfect for events, easy to make, and because they’re no-bake, they’re a great go-to dessert for any season.
Not only are they delicious, but mini peanut butter pies also offer several advantages:
- Portion Control: Everyone gets their own pie, meaning no need to slice or worry about uneven servings.
- Great for Parties: Mini pies are a hit at parties and potlucks since they’re easy to transport and serve.
- No Oven Needed: This no-bake recipe is ideal when you want to make dessert without heating up the kitchen.
- Customizable: From the crust to the toppings, these pies can be tailored to your preferences.
Now, let’s dive into how to make these irresistible mini peanut butter pies.
Ingredients
For the Crust:
- 1 1/2 cups graham cracker crumbs (or crushed Oreos for a chocolate crust)
- 1/4 cup granulated sugar (omit if using Oreos)
- 1/2 cup unsalted butter (melted)
For the Peanut Butter Filling:
- 1 cup creamy peanut butter
- 8 oz cream cheese (softened)
- 1 cup powdered sugar
- 1 teaspoon vanilla extract
- 1 cup heavy whipping cream (or whipped topping)
For the Topping:
- Mini chocolate chips or chocolate shavings
- Whipped cream (for garnish, optional)
- Chopped peanuts (optional)
Instructions
Step 1: Make the Crust
To start, prepare your crust. You can choose between a classic graham cracker crust or a rich Oreo crust depending on your preference. Both provide a delicious base, but the Oreo crust gives a decadent chocolatey twist that pairs beautifully with the peanut butter filling.
- In a medium bowl, combine the graham cracker crumbs (or crushed Oreos) with melted butter and granulated sugar (if using graham crackers). Stir until the mixture resembles wet sand.
- Press the mixture firmly into the bottom of mini pie tins, or a muffin tin lined with paper liners. Use the back of a spoon or your fingers to press it down evenly.
- Place the crusts in the refrigerator to set while you prepare the filling.
Step 2: Make the Peanut Butter Filling
The filling is the heart of these mini pies. Rich, creamy, and loaded with peanut butter flavor, it’s easy to whip together in just a few minutes.
- In a large mixing bowl, beat the softened cream cheese and peanut butter until smooth and creamy.
- Add the powdered sugar and vanilla extract, and continue to mix until well combined.
- In a separate bowl, whip the heavy cream until stiff peaks form, or use store-bought whipped topping. Gently fold the whipped cream into the peanut butter mixture until smooth and fluffy.
Step 3: Fill the Pies
- Remove the crusts from the refrigerator and spoon the peanut butter filling into each one, spreading it evenly. Smooth the tops with a spatula.
- Once filled, refrigerate the mini pies for at least 2-3 hours to allow the filling to set completely. You can also prepare them the night before to ensure they’re fully set and chilled.
Step 4: Add Toppings
Now comes the fun part: the toppings! Whether you’re a chocolate lover or want to keep things simple, the options are endless.
- For a classic touch, sprinkle mini chocolate chips or chocolate shavings over the top of each pie.
- Add a dollop of whipped cream for an extra creamy finish, and if you’re feeling adventurous, chopped peanuts give a delightful crunch that contrasts with the smooth filling.
Step 5: Serve
Serve your mini peanut butter pies chilled. These pies are perfect for parties, family gatherings, or a special treat just for you!
Variations
Mini peanut butter pies are incredibly versatile, and you can experiment with different ingredients and toppings to make them your own. Here are a few variations to try:
Chocolate Peanut Butter Pies
For the ultimate peanut butter and chocolate combination, add a drizzle of melted chocolate or hot fudge over the top of the pies. You can even use a chocolate crust (like crushed Oreos) to double down on the chocolatey goodness.
Peanut Butter Cup Pies
Add mini peanut butter cups or chopped peanut butter cups as a topping for an extra layer of indulgence. This variation is especially popular with kids and chocolate lovers.
Nut-Free Option
If you have a peanut allergy or simply want a different flavor, you can substitute the peanut butter with almond butter, cashew butter, or even sunflower seed butter for a nut-free alternative.
Frozen Mini Pies
To make a cool, refreshing summer treat, pop the mini pies into the freezer for a few hours and serve them frozen. This gives them an ice cream-like texture that’s perfect for hot days.
Frequently Asked Questions (FAQs)
Can I make these pies ahead of time?
Absolutely! Mini peanut butter pies can be made up to 2 days in advance. Store them in the refrigerator, covered, and add toppings just before serving.
Can I freeze mini peanut butter pies?
Yes, these pies freeze beautifully. Wrap each pie in plastic wrap and place them in a freezer-safe container. When you’re ready to eat, let them thaw in the refrigerator for a few hours or enjoy them frozen for a chilled dessert.
How long can I store these pies?
You can store mini peanut butter pies in the refrigerator for up to 5 days. Keep them covered to maintain freshness.
Mini Peanut Butter Pies are a delightful, creamy, no-bake dessert that’s perfect for any occasion. They’re easy to make, require minimal ingredients, and are sure to impress anyone who takes a bite. Whether you’re a peanut butter enthusiast or just looking for a simple yet indulgent treat, these mini pies are sure to become a favorite in your household. With endless topping options and variations, you can make them your own and enjoy them any time you need a sweet pick-me-up.
