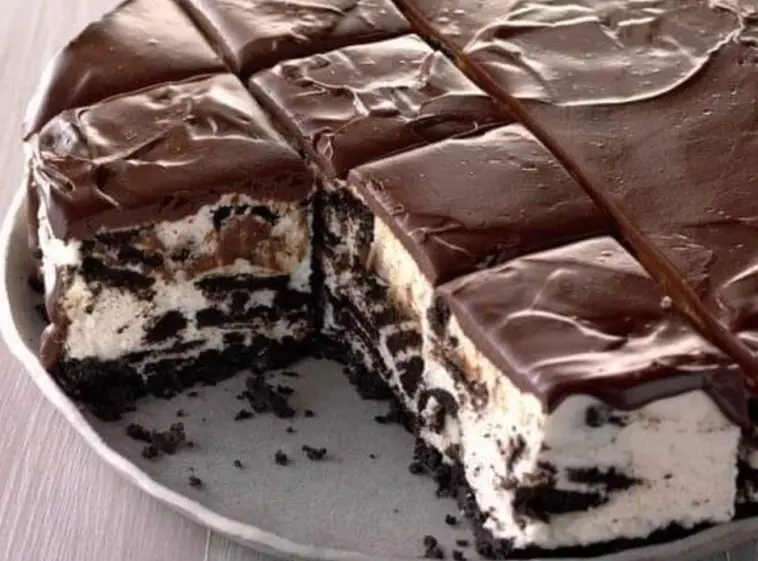
Icebox Cookie Cheesecake is a delightful, no-bake dessert that combines the rich and creamy texture of cheesecake with the crunchy goodness of Oreos. Perfect for hot summer days or any time you want a delicious dessert without turning on the oven, this cheesecake is easy to make and sure to impress. Let’s dive into the recipe and learn how to create this delicious Icebox Cookie Cheesecake step-by-step.
Ingredients
For the Crust:
- 3 cups chocolate graham cracker crumbs (2 sleeves from a 3-sleeved box)
- 1/2 cup sugar
- 12 tablespoons butter, melted
For the Filling:
- 2 cups whipping cream
- 4 packages (8 oz each) cream cheese, softened
- 1 1/3 cups sugar
- 1 package (1 lb 2 oz) of Oreos, each cookie broken into thirds or fourths
Instructions
Step 1: Prepare the Crust
- Mix Ingredients: In a medium bowl, combine the chocolate graham cracker crumbs, sugar, and melted butter. Mix until the crumbs are evenly coated and the mixture resembles wet sand.
- Form the Crust: Press the mixture firmly into the bottom and slightly up the sides of a 9-inch springform pan. Use the back of a spoon or the bottom of a measuring cup to help pack it down tightly. Place the crust in the refrigerator to set while you prepare the filling.
Step 2: Prepare the Filling
- Whip Cream: In a large mixing bowl, beat the whipping cream with an electric mixer until stiff peaks form. Set aside.
- Beat Cream Cheese and Sugar: In another large mixing bowl, beat the softened cream cheese and sugar together until smooth and creamy.
- Combine Mixtures: Gently fold the whipped cream into the cream cheese mixture until well combined.
- Add Oreos: Fold in the broken Oreo pieces, ensuring they are evenly distributed throughout the mixture.
Step 3: Assemble the Cheesecake
- Add Filling to Crust: Pour the cream cheese mixture into the prepared crust, spreading it out evenly.
- Chill: Cover the cheesecake with plastic wrap and refrigerate for at least 4 hours, or until firm. For best results, let it chill overnight.
Serving
- Serve: Once the cheesecake is fully set, remove it from the springform pan and transfer it to a serving platter. Slice and serve this delicious Icebox Cookie Cheesecake chilled. Enjoy the creamy, crunchy goodness in every bite!
Cooking Notes
- Whipping Cream: Ensure the whipping cream is very cold before beating to help it whip up faster and stay firm.
- Cream Cheese: Make sure the cream cheese is fully softened to avoid lumps in your cheesecake filling.
- Oreos: For extra texture, you can leave some larger chunks of Oreos in the filling.
Frequently Asked Questions
Q: Can I use a different type of cookie for the crust? A: Yes, you can use regular graham crackers, vanilla wafers, or any other type of cookie crumb you prefer for the crust.
Q: How do I store leftovers? A: Store any leftover cheesecake in an airtight container in the refrigerator for up to 5 days.
Q: Can I make this cheesecake ahead of time? A: Yes, this cheesecake can be made a day in advance. Just keep it covered in the refrigerator until ready to serve.
Keto/Low Carb Version
To make a keto or low-carb version of Icebox Cookie Cheesecake, follow these modifications:
- Crust: Use a crust made from almond flour, cocoa powder, and a keto-friendly sweetener like erythritol.
- Sugar: Replace the sugar in the filling with a keto-friendly sweetener like erythritol or monk fruit sweetener.
- Cookies: Use a keto-friendly cookie or omit the cookies and add extra chopped nuts for crunch.
Icebox Cookie Cheesecake is a delicious and easy-to-make dessert that’s perfect for any occasion. With its creamy filling, crunchy Oreo pieces, and no-bake convenience, it’s sure to become a favorite in your household. Try this recipe today and enjoy a delightful homemade cheesecake that’s both satisfying and simple to prepare!
Did you enjoy this Icebox Cookie Cheesecake recipe? Share your experience in the comments below and tag us on social media with your delicious creations! For more no-bake and easy recipes, subscribe to our blog and follow us for the latest updates. Happy baking!


