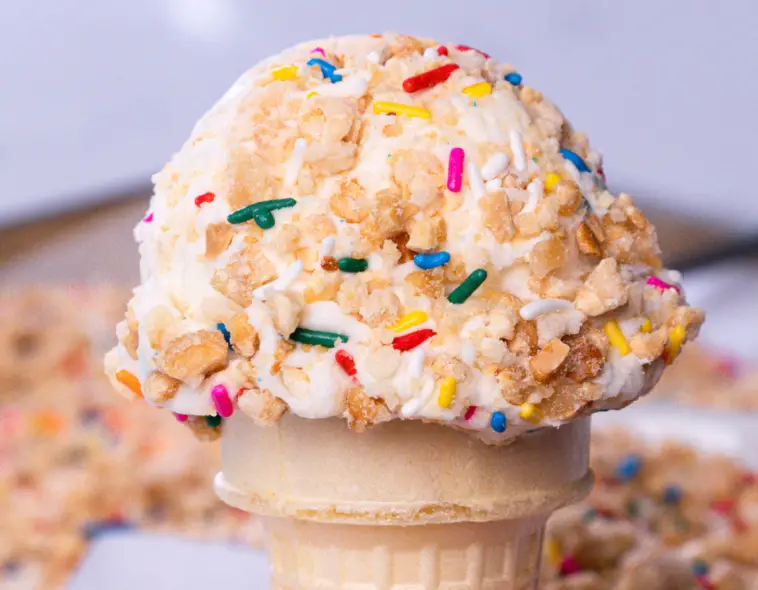
Welcome to our blog! Today, we’re recreating the classic Dairy Queen Crunch Cone with a homemade twist. This nostalgic treat combines creamy vanilla ice cream, a crunchy peanut-sprinkle coating, and a cake cone for the perfect summer dessert. Let’s dive into how to make it!
Ingredients
- 2 cups granulated sugar
- 1 cup water
- 2 cups unsalted roasted peanuts, crushed
- 1 1/4 cup Betty Crocker rainbow sprinkles
- Vanilla ice cream in a cake cone, for serving
Instructions
Making the Crunch Coating:
- Prepare a baking sheet: Line a baking sheet with parchment paper or a silicone mat.
- Prepare the sugar syrup: In a medium saucepan, combine the granulated sugar and water. Heat over medium-high heat, stirring constantly, until the sugar dissolves completely.
- Cook the syrup: Bring the sugar syrup to a boil. Continue to cook, without stirring, until the mixture reaches 300°F (hard crack stage) on a candy thermometer. This will take about 10-15 minutes.
- Add peanuts and sprinkles: Remove the saucepan from heat. Quickly stir in the crushed peanuts and rainbow sprinkles until evenly coated with the hot sugar syrup.
- Spread onto baking sheet: Immediately pour the hot mixture onto the prepared baking sheet. Use a spatula or the back of a spoon to spread it out evenly into a thin layer. Let it cool completely and harden.
- Break into pieces: Once cooled and hardened, break the crunchy mixture into small pieces or chunks. You can use a knife or your hands to break it into desired sizes.
Serving:
- Assemble the Crunch Cone: Scoop vanilla ice cream into a cake cone. Dip the top of the ice cream into the prepared crunchy peanut-sprinkle mixture, coating it generously.
- Serve immediately: Enjoy your homemade Dairy Queen Crunch Cone immediately after assembling, while the crunchy coating is crisp and the ice cream is cold.
Cooking Notes
- Handling Hot Sugar Syrup: Be cautious when working with hot sugar syrup as it can cause burns. Use a candy thermometer for accuracy and handle with care.
- Crunch Mixture Storage: Store any leftover crunch mixture in an airtight container at room temperature for up to a week. Use it to top ice cream or other desserts.
Variations
Chocolate Coating:
- Add 1/2 cup of cocoa powder to the sugar syrup before boiling for a chocolate-flavored crunch coating.
Nut-Free Option:
- Replace the crushed peanuts with crushed pretzels or cereal for a nut-free alternative.
This Copycat Dairy Queen Crunch Cone recipe brings the nostalgia of a classic summer treat right to your kitchen. With its crunchy peanut-sprinkle coating and creamy vanilla ice cream, it’s sure to delight both kids and adults alike. Enjoy making and savoring this homemade version of a beloved dessert!
Frequently Asked Questions (FAQs)
1. Can I use salted peanuts?
Yes, you can use salted peanuts if you prefer a slightly salty-sweet flavor in the crunch coating.
2. How do I store leftover Crunch Cone pieces?
Store any leftover Crunch Cone pieces in an airtight container at room temperature. They will stay crunchy for several days.
3. Can I use other types of sprinkles?
Yes, you can use any variety of sprinkles or jimmies to customize the appearance of your Crunch Cone coating.
4. Can I make the crunch coating ahead of time?
Yes, you can make the crunch coating ahead of time and store it in an airtight container until ready to use. Re-crisp in the oven if needed before assembling the cones.
5. Can I use this coating for other desserts?
Absolutely! This crunchy peanut-sprinkle mixture is versatile and can be used to top sundaes, milkshakes, or even as a garnish for cakes and cupcakes.
Enjoy creating and indulging in your homemade Dairy Queen Crunch Cones! Happy dessert-making!


