Introduction
Imagine stepping into a cozy homestead kitchen filled with the aroma of freshly baked bread and savory fillings. In this article, we will delve into the world of classic homestead Russian piroshki. These delightful hand pies have been a staple in Russian households for generations, offering a comforting and satisfying meal for families and guests alike. Join us on a culinary journey as we explore the art of crafting these beloved piroshki from scratch.
Classic Russian piroshki recipes hold a special place in the hearts of many, offering a taste of tradition and nostalgia with each bite. From the tender dough to the flavorful fillings, every element of these piroshki speaks to the rich culinary heritage of Russia. Whether enjoyed as a snack, appetizer, or main course, homemade Russian piroshki are sure to delight your taste buds and warm your soul.
As we uncover the secrets behind crafting the perfect piroshki, we will also share essential tips and techniques to help you master this classic dish. From choosing the best dough for Russian piroshki to exploring a variety of traditional fillings, you will gain a deeper appreciation for the art of piroshki making. Get ready to roll up your sleeves and embark on a culinary adventure filled with flavor, texture, and heartwarming goodness.
Join us as we unlock the essence of Russian comfort food and learn how to create your own batch of classic homestead piroshki that will surely become a favorite at your table.
Why You’ll Love This Recipe
Our classic homestead piroshki recipe offers a delightful combination of crispy, golden-brown dough and rich, flavorful fillings that are sure to please your palate. These piroshki are not only easy to make but also incredibly versatile, allowing you to experiment with different fillings to suit your taste preferences. Whether you are a seasoned cook or a beginner in the kitchen, this recipe provides a rewarding culinary experience that will leave you craving more.
One of the best features of this recipe is its homemade charm – from mixing the dough to shaping the piroshki, each step is a labor of love that results in a delicious and satisfying treat. With simple ingredients and clear instructions, you can recreate the magic of Russian homestead cooking in your own kitchen. Say goodbye to store-bought piroshki and embrace the joy of crafting these handcrafted delights from scratch.
Moreover, these piroshki offer a comforting and hearty meal that is perfect for sharing with family and friends. Whether served as a quick snack or a main course, these piroshki are guaranteed to become a crowd-pleaser at any gathering. Dive into the world of Russian cuisine and discover the joy of homemade piroshki that are as delicious as they are memorable.
Experience the satisfaction of creating your own batch of piroshki and enjoy the warm, comforting flavors that make this classic Russian dish a beloved favorite in households around the world.
Ingredients
For the Dough:
– All-purpose flour
– Warm water
– Yeast
– Sugar
– Salt
– Vegetable oil
– Egg
For the Filling:
– Ground beef
– Onion
– Garlic
– Potatoes
– Salt and pepper
– Herbs and spices (optional)
– Egg wash (for brushing)
Feel free to customize the filling with your favorite ingredients such as mushrooms, cabbage, or cheese to create a unique twist on this classic recipe.
Step-by-Step Instructions
1. Prepare the dough by mixing flour, warm water, yeast, sugar, salt, vegetable oil, and egg in a bowl. Knead the dough until smooth and elastic, then let it rise until doubled in size.
2. While the dough is rising, prepare the filling by browning ground beef with onions, garlic, and diced potatoes. Season with salt, pepper, and your choice of herbs and spices.
3. Once the dough has doubled in size, divide it into small portions and roll each portion into a circle. Place a spoonful of the filling in the center of each circle.
4. Fold the dough over the filling to form a semicircle and crimp the edges to seal the piroshki. Place the piroshki on a baking sheet lined with parchment paper.
5. Brush the piroshki with egg wash for a golden finish, then bake in a preheated oven until they are puffed and golden brown.
6. Serve the piroshki warm and enjoy the delicious combination of crispy dough and savory filling.
Pro Tip: For extra flavor, you can brush the baked piroshki with melted butter before serving.
Expert Tips for Success
– Ensure the yeast is activated properly by using warm water and sugar. The yeast should foam and bubble before adding it to the dough.
– Knead the dough until it is smooth and elastic to ensure a light and airy texture in the piroshki.
– Do not overfill the piroshki to prevent the filling from leaking during baking.
– Brushing the piroshki with egg wash before baking helps create a beautiful golden crust.
– Allow the piroshki to cool slightly before serving to avoid burning your mouth on the hot filling.
Variations and Substitutions
For a vegetarian version of this recipe, you can substitute the ground beef with mushrooms or a medley of sautéed vegetables. You can also experiment with different fillings such as cheese and spinach, lentils and carrots, or even sweet fillings like apples and cinnamon for a dessert twist on the classic piroshki.
Feel free to get creative with your piroshki fillings and tailor them to your taste preferences for a truly unique culinary experience.
Serving Suggestions
These classic homestead piroshki are best enjoyed fresh out of the oven, served warm with a dollop of sour cream or a side of tangy pickles. Pair them with a crisp green salad or a bowl of borscht for a complete Russian meal that will transport you to the heart of traditional Russian cuisine.
For a casual gathering or a cozy dinner at home, serve these piroshki alongside a selection of pickled vegetables, hearty soups, and a bottle of chilled kvass or Russian tea for a truly authentic dining experience.
Whether enjoyed as a snack, appetizer, or main course, these piroshki are sure to impress your guests and leave them craving more of this classic Russian comfort food.
FAQs
Q: Can I freeze the piroshki before baking them?
A: Yes, you can assemble the piroshki and freeze them on a baking sheet. Once frozen, transfer them to a freezer-safe bag. When ready to bake, simply brush with egg wash and bake from frozen, adding a few extra minutes to the baking time.
Q: How long do the baked piroshki stay fresh?
A: Baked piroshki can be stored in an airtight container at room temperature for up to 2 days. To reheat, simply warm them in the oven until heated through.
Q: Can I make mini piroshki for a party?
A: Yes, you can divide the dough into smaller portions to make bite-sized piroshki perfect for serving at parties or as appetizers. Adjust the baking time accordingly for smaller piroshki.
Q: What is the best way to reheat leftover piroshki?
A: To reheat leftover piroshki, place them in a preheated oven at 350°F (180°C) for about 10-15 minutes or until heated through.
Final Thoughts
As you embark on your piroshki-making journey, remember that the heart and soul you put into each step of the process will shine through in the final product. These classic homestead piroshki are more than just a recipe – they are a reflection of tradition, family, and the joy of sharing delicious food with loved ones.
So gather your ingredients, roll up your sleeves, and let the aroma of freshly baked piroshki fill your kitchen with warmth and comfort. With each bite of these golden hand pies, you will taste the love and heritage that have made Russian piroshki a beloved comfort food for generations.
From the first knead of the dough to the last savory bite, savor the experience of creating your own batch of classic homestead piroshki and embrace the magic of Russian culinary tradition. Bon appétit!
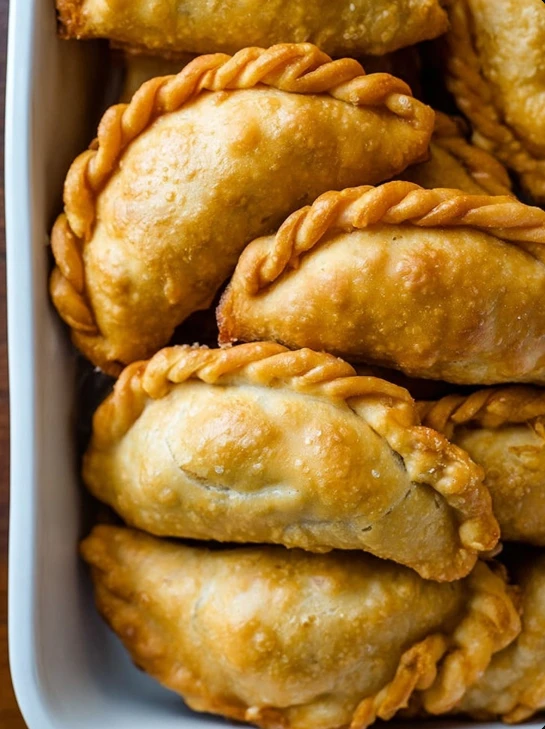
Classic Homestead Russian Piroshki
Delight in the art of crafting classic homestead Russian piroshki with crispy, golden-brown dough and rich, flavorful fillings. These hand pies offer a comforting and satisfying meal filled with tradition and nostalgia.
Ingredients
- 3 cups all-purpose flour
- 1 cup warm water
- 1 packet yeast
- 1 tablespoon sugar
- 1 teaspoon salt
- 2 tablespoons vegetable oil
- 1 egg
- 1 pound ground beef
- 1 onion, diced
- 2 cloves garlic, minced
- 2 potatoes, diced
- Salt and pepper to taste
- Herbs and spices (optional)
- Egg wash (1 egg beaten)
Directions
-
Prepare the dough by mixing flour, warm water, yeast, sugar, salt, vegetable oil, and egg in a bowl. Knead until smooth and let it rise.
-
Brown ground beef with onions, garlic, and potatoes for the filling. Season with salt, pepper, and herbs/spices.
-
Divide the risen dough, roll into circles, place filling, fold over to form semicircles, crimp edges, place on baking sheet.
-
Brush piroshki with egg wash, bake until golden brown.
-
Serve warm and enjoy the crispy dough and savory filling.
Nutrition Facts