Unlock the secrets of generations past with this timeless recipe passed down from my beloved mother-in-law. Rooted in tradition and cherished for over a century, this culinary gem requires no yeast or oven, making it accessible to home cooks of all skill levels. With just a handful of simple ingredients and a touch of love, you can recreate the magic of old-world baking right in your own kitchen. So let’s dive into this delicious journey and pay homage to the culinary heritage of our ancestors!
Ingredients:
For the First Dough:
- 1 egg
- A pinch of salt
- 15ml unsalted butter
- 40ml milk
- 150g all-purpose flour
For the Second Dough:
- 2 eggs
- A pinch of salt
- 38g (3 tablespoons) white sugar
- 30ml unsalted butter
- 190g all-purpose flour
Instructions:
First Dough:
- Prepare the Ingredients:
- In a mixing bowl, crack open one egg and add a pinch of salt, unsalted butter, and milk.
- Mix the Ingredients:
- Whisk the ingredients together until well combined.
- Incorporate the Flour:
- Gradually add the all-purpose flour to the wet ingredients, stirring continuously until a dough forms.
- Knead the Dough:
- Transfer the dough to a lightly floured surface and knead it for a few minutes until smooth and elastic.
- Rest the Dough:
- Cover the dough with a clean kitchen towel and let it rest while you prepare the second dough.
Second Dough:
- Mix the Ingredients:
- In another mixing bowl, crack open two eggs and add a pinch of salt, white sugar, and unsalted butter.
- Whisk Thoroughly:
- Whisk the ingredients together until the sugar is dissolved and the mixture is smooth.
- Add the Flour:
- Gradually incorporate the all-purpose flour into the wet ingredients, stirring until a soft dough forms.
- Combine the Doughs:
- Once both doughs are ready, gently combine them together to form a single dough ball.
- Shape the Dough:
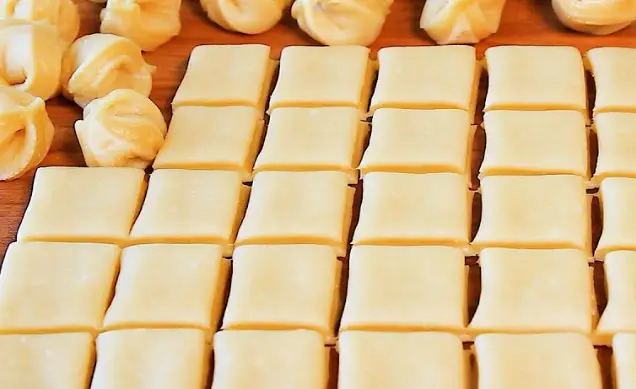
- Divide the dough into small portions and shape them into desired shapes, such as rolls or twists.
- Cooking Without an Oven:
- Heat a non-stick skillet or frying pan over medium-low heat.
- Place the shaped dough portions onto the skillet, leaving space between each one.
- Cook Until Golden:
- Cook the dough portions for about 5-7 minutes on each side, or until they are golden brown and cooked through.
- Serve and Enjoy:
- Once cooked, remove the dough portions from the skillet and let them cool slightly before serving.
Cook’s Notes and Variations:
- Enhance the Flavor: Add a hint of vanilla extract or grated lemon zest to the dough for an extra burst of flavor.
- Experiment with Fillings: Get creative with your fillings by adding chocolate chips, dried fruit, or nuts to the dough before shaping.
- Glaze it Up: Brush the cooked dough portions with a simple sugar glaze made from powdered sugar and milk for added sweetness and shine.
Frequently Asked Questions (FAQs):
- Can I use whole wheat flour instead of all-purpose flour? Yes, you can substitute whole wheat flour for all or part of the all-purpose flour in this recipe. Keep in mind that the texture and flavor may vary slightly.
- Can I make this recipe dairy-free? Absolutely! You can use plant-based milk and vegan butter as substitutes for dairy milk and unsalted butter, respectively, to make this recipe dairy-free.
- How should I store the leftover bread? Store any leftover bread in an airtight container or resealable plastic bag at room temperature for up to 2-3 days. You can also freeze the bread for longer storage.
Keto and Low-Carb Versions:
For a keto or low-carb version of this recipe, you can experiment with alternative flours such as almond flour or coconut flour and use a sugar substitute like erythritol or stevia instead of white sugar.
With this timeless recipe from my mother-in-law’s kitchen, you can experience the magic of homemade bread without yeast or an oven. Whether you’re savoring it with a cup of tea or sharing it with loved ones, this bread embodies the warmth and comfort of generations past. So gather your ingredients, channel the spirit of tradition, and let the aroma of freshly baked bread fill your home. Here’s to the joys of heritage cooking and the memories shared around the table!


